If you're looking for a way to improve the security of your WordPress site, you must be aware that it's not exactly enough to just have a strong password.
In this article, I will talk about simple and effective ways to improve the security of your WordPress site. Let's get started!
Why You Should Password Protect Your WordPress
Before we get to the details, let's see the reasons why you might want to password protect your WordPress site.
- Secret content. Effective password protection allows you to securely store content on WordPress that's only accessible with a password. This feature can be used for a secret project, works in progress or anything else that you want to be accessible only to you.
- Membership privileges. You can use this feature to have certain content only be available to a select type of user. For instance, if you're running an e-commerce website, you can set up a password protected page where only members can see presale items.
- It's better to be prepared in case anyone wants to gain access to your site. Hackers usually target websites with weaker security and often employ brute-force attacks, which are meant to crack weak password protection.
Password Protecting Your Website Through Plugins
If you're familiar with WordPress, you must know that it offers a vast amount of plugins to help you with almost anything. Consider visiting Hosting Wiki for more information on how you can grow your WordPress site, as they cover plenty of topics related to the CMS that can help you get the most out of it.
When you search for password protection in the Plugin search bar, hundreds of plugin options will show up. It can be overwhelming for some people! Here I will cover some of the best plugins to protect your site, so you don't need to browse through all those options. Keep in mind that it all comes down to your needs and what fits your project best.
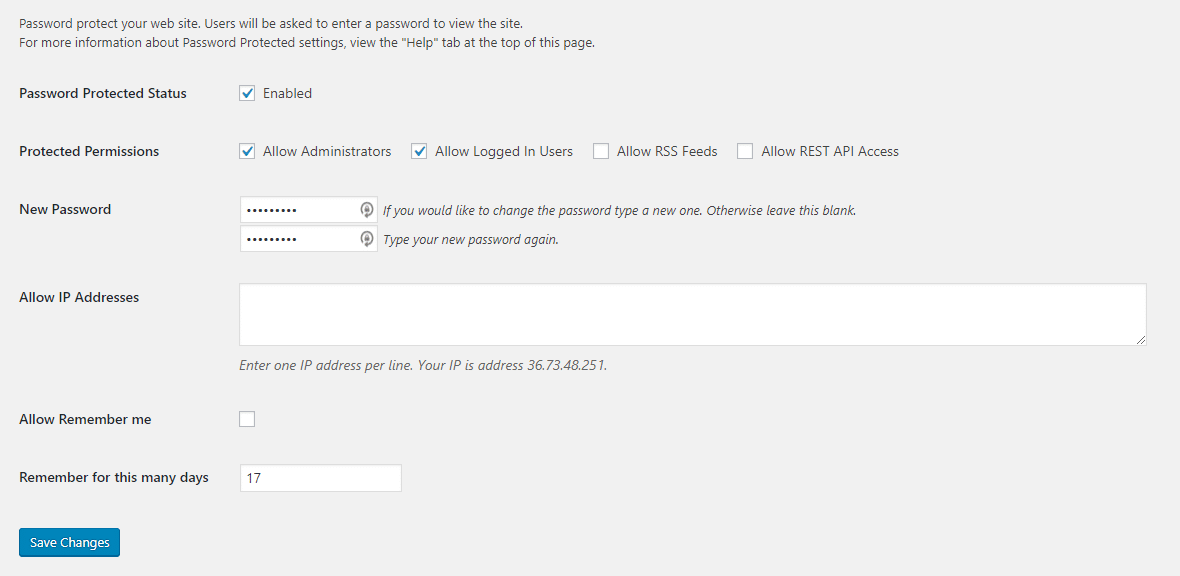
If you're looking for a way to password protect your entire WordPress site, this plugin is one of the best options available. It's very easy to use and top of that, it's free!
Installing it is the same as with any other plugin. Head to the sidebar and find Plugin -> Add New then find Password Protected through the search bar.
Once you install and activate the plugin, scroll down the sidebar and head to Settings -> Password Protected to activate the features. Put a check on Password Protected Status, set your preferred options, your password, then save the changes and you're all set! Additionally, you can allow only certain IPs to log in, turn on the Remember me feature and more.

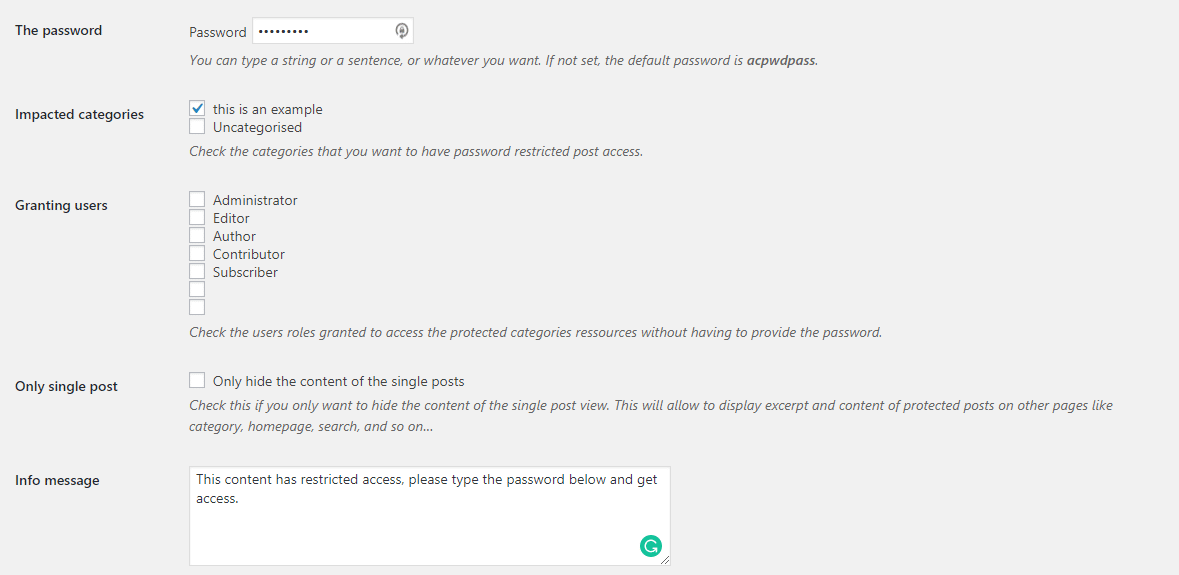
If you think locking your entire site is too much, then you can opt to protect a particular post, page or category. WordPress comes with a built-in feature to change the visibility of a single post. However, if you want to put a password on a whole category, you might want to check out the Access Category Password plugin.
Even though it is not that popular, as it offers a niche feature, it does the job reliably. Start by choosing a password, select the category you want to hide from the public and click Save. As simple as that!

It also offers other great features such as info and error message edits and the ability to grant access to selected users or user types.
Changing WordPress' default login URL might have never crossed your mind, but if you want a more secure site, you should do it. Once someone finds out you're using WordPress, they basically know the first step of getting into your dashboard - the default login URL.
This plugin lets you modify your login URL. Once you install and activate the plugin, head to the sidebar and click General, scroll down, and you will find the option at the very bottom. Remember to change the URL from time to time for improved security.

Using shared computers and networks can be considered insecure. To fix this issue we can use salt keys! Naturally, WordPress stores your login credentials in cookies. Salt keys encrypt this data so no one can read it as a simple text document.
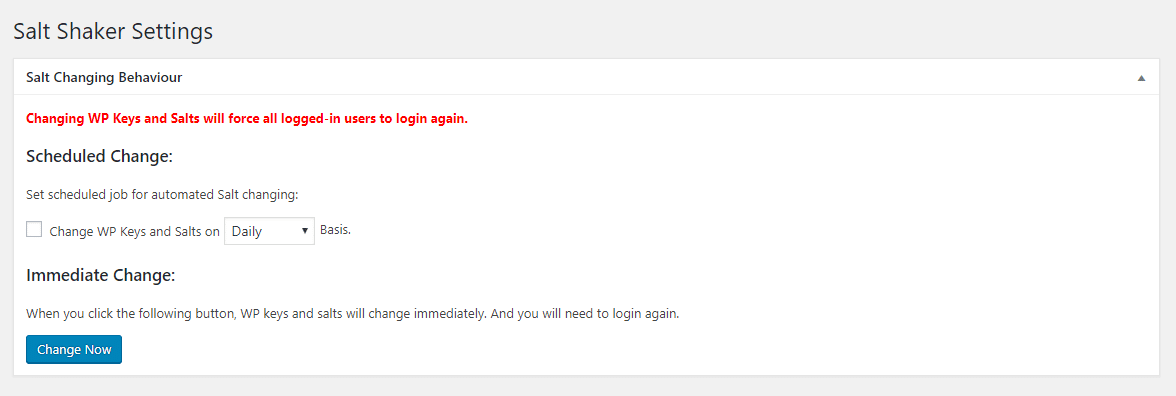
That said, it is ideal to change your salt keys every now and then to avoid the risk of them being cracked. You can do it manually, or install Salt Shaker, a free plugin that automatically updates these keys for you.
Once you install the plugin, head to the sidebar, then find the plugin under Tools -> Salt Shaker.
You will then have the option to adjust the update schedule of the salt keys. When you're done, click Change Now. All logged-in users will be logged out and redirected to the login page, and the salt keys will be updated.

Wrapping Up
No matter how big or small your website is, adding an extra layer of protection is always worth it. Now that you've learned the easiest ways to do it, why not try them and see if they work for you. Good luck!
